|
|
Pi2Go Assembly Instructions |
|
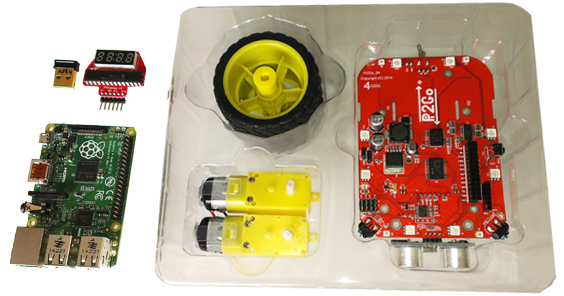
What you need:
|
 |
Step by step assembly:
|
1.
|
|
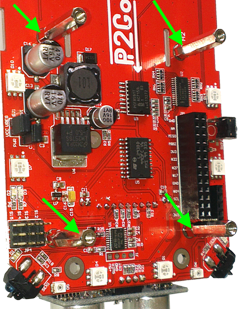
2.
|
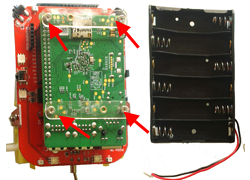
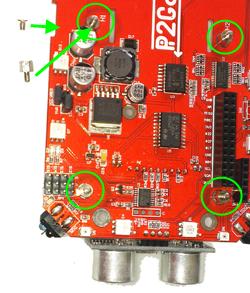 Mount 4 small pillars with 2.5 mm screws. |
|
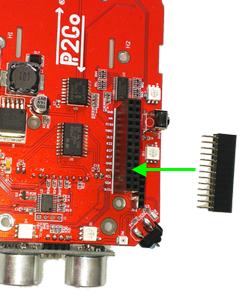
3. |
|
4. |
|
|
5. |
|
6. |
|
|
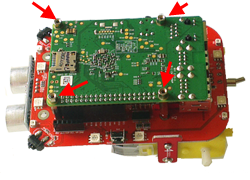
7. |
|
8.
|
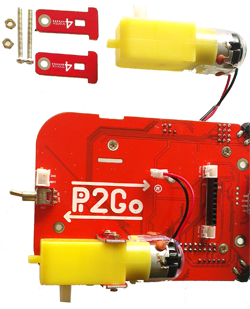
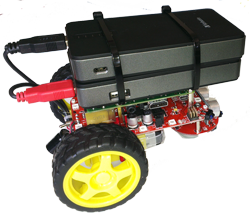
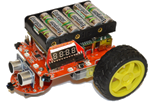
Push 2 wheels carefully on motor axes (by applying counter-force)
Insert batteries and actuate power switch. Red LED must light. If not, check battery positions |
|
|
|
The motors are directly driven by the battery voltage and have no wheel encoders. So a stable power supply is essential to get reproducible movements. NiHM or NiCd batteries are not suitable, because they only deliver 1.2V each. Because rechargable batteries are recommended, you must use NiZn batteries (AA format). This requires a special battery charger.
|
 |
|
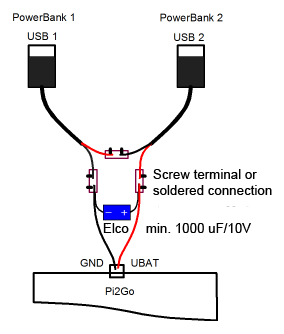
A better solution is to use USB PowerBanks now available in many different flavors. They all deliver stabilized 5 V. To get at least 9 V, two of them must be connected in series. Because of the electronic circuitry of the PowerBanks, a blocking capacitor of some 1000 uF must be inserted for the 10 V output. Fix a label that clearly states the warning: Never charge the two powerbanks with the same charger! (When the specially prepared cable that serializes the voltage is plug in the powerbank, a short circuit occurs.) To fix the packs, two plastic strips may be used that are fixed with 2.5 mm screws at the small battery holder pillars after drilling 2 small holes into the plastic strips. The PowerBank should not be too big (max. 6.5 cm large) and not too heavy. Rectangular units with about 6000 mAh capacity are the best compromise. |
|
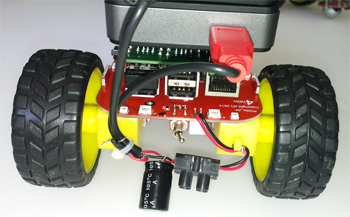
To connect the PowerBanks you use two standard USB cables that you cut in half. Take off the isolation carefully and you find 4 (sometimes only 2) strands. Two of them are mostly colored black (Ground) and red (V+). Strip them carefully and connect them using screen terminals as shown in the diagram below. If you owe a soldering iron and some shrink tubing, you may assemble the wires more professionally. The capacitor can be soldered directly to the Pi2Go soldering spots. It is up to your skills and engineering faculties to assemble the wires differently, but be very careful about the polarities of the cables and the electrolytic capacitor.
|
|