| |
The source code of all examples is included in the JDroidLib distribution.
Touch, Actor-Touch and Multi-Touch Events
1 Touch Events
Touch events are the equivalent of mouse events in Java SE and implemented analogous as in the JGameGrid library by registering a event listener, called GGTouchListener. The registering method addTouchListener takes a GGTouchListener reference and an OR-mask that defines which types of touches are enabled. The following events are supported: click, double-click, drag, press, long-press and release. A GGTouch reference is passed to the touchEvent() callback to deliver information about the particular touch event.
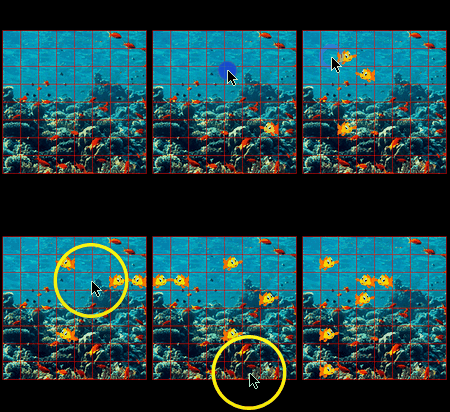
In the following demonstration each touch creates a new Fish instance at the touch location. It is our showpiece of OOP, because every instance of the class Fish created by a touch event is a fully featured individual who "knows" how to move.
package ch.aplu.tut;
import ch.aplu.android.*;
public class Ex10 extends GameGrid implements GGTouchListener
{
public Ex10()
{
super(8, 8, cellZoom(62), RED, "reef", false);
}
public void main()
{
addTouchListener(this, GGTouch.click);
doRun();
}
public boolean touchEvent(GGTouch touch)
{
addActor(new Fish(), toLocationInGrid(touch.getX(), touch.getY()));
// addActor(new Fish(), getTouchLocation());
return true;
}
} |
Discussion: We use the same simple Fish class as in Tutorial 8 that just moves forth and back. From the touch parameter the current screen coordinates can be retrieved with the methods getX() and getY(). The x-y coordinates are not restricted to the game grid window, but return pixel coordinates in respect to the full window with the origin at the upper left vertex. The coordinates must be converted to game grid locations by applying the toLocation() or toLocationInGrid() methods. As an alternative, getTouchLocation() may be used.
Next you learn how to drag an actor in a grid based game window. Dragging is a common action for many games to let the player select an actor's starting location.
package ch.aplu.tut;
import ch.aplu.android.*;
import android.graphics.*;
public class Ex10a extends GameGrid implements GGTouchListener
{
private Actor actor;
public Ex10a()
{
super(8, 8, cellZoom(60), Color.RED);
}
public void main()
{
addActor(new Actor("nemo"), new Location(5, 5));
addTouchListener(this, GGTouch.press |
GGTouch.drag |
GGTouch.release);
}
public boolean touchEvent(GGTouch touch)
{
Location location = toLocationInGrid(touch.getX(), touch.getY());
switch (touch.getEvent())
{
case GGTouch.press:
actor = getOneActorAt(location);
break;
case GGTouch.drag:
if (actor != null)
actor.setLocation(location);
break;
case GGTouch.release:
if (actor != null)
actor.setLocation(location);
break;
}
refresh();
return true;
}
}
|
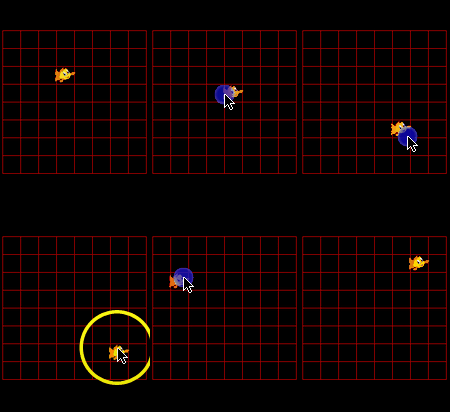
Discussion: We enable the press, drag and release event by selecting the appropriate GGTouch OR-mask. When a press event is triggered, getOneActor() returns a null reference if the actor is not in the current cell and nothing happens for the drag and release event. Otherwise we use the actor reference in the drag and release section of the switch statement.
2 Actor-Touch Events
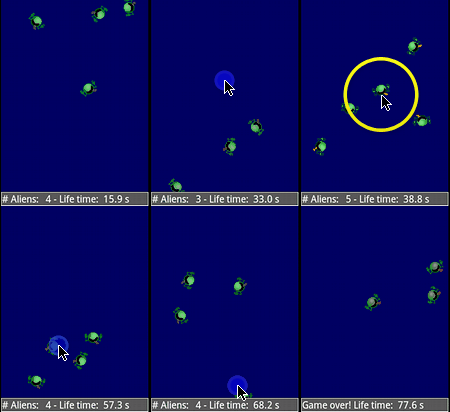
It is cumbersome to use touch event to "catch" moving actors in a pixel based game, because you have to do a lot of calculations to track all actors and check if you get a "hit". The actorTouched() callback based on JDroidLib's collision detection may help you a lot and simplify the program considerably. The following example is already a simple game, where you must catch (destroy) moving aliens as quick as possible. The lifetime of each alien is counted and added to your score. The alien lives until it leaves the window or you catch him. The aim of the game is to minimize the score. It is up to you to modify and improve the game.
package ch.aplu.tut;
import ch.aplu.android.*;
import android.graphics.*;
import java.util.Date;
public class Ex11 extends GameGrid implements GGActorTouchListener
{
private long accTime = 0;
private class Alien extends Actor
{
private long birthTime;
public Alien()
{
super(true, "alien");
birthTime = new Date().getTime();
}
public void act()
{
move();
if (!isInGrid())
{
removeSelf();
accTime += getLifeTime();
}
}
public long getLifeTime()
{
return new Date().getTime() - birthTime;
}
}
private GGStatusBar status;
public Ex11()
{
super(true, windowZoom(500));
status = addStatusBar(30);
}
public void main()
{
getBg().clear(Color.rgb(0, 0, 100));
doRun();
setSimulationPeriod(50);
for (int i = 0; i < 40; i++)
{
Alien alien = new Alien();
addActorNoRefresh(alien, getRandomLocation(),
getRandomDirection());
alien.addActorTouchListener(this, GGTouch.press, false);
delay(500);
}
setTouchEnabled(false);
status.setText(
String.format("Game over! Life time: %5.1f s",
accTime / 1000.0));
doPause();
refresh();
}
public void actorTouched(Actor actor, GGTouch touch,
Point spot)
{
accTime += ((Alien)actor).getLifeTime();
actor.removeSelf();
}
public void act()
{
int nb = getNumberOfActors(Alien.class);
status.setText(
String.format("# Aliens: %3d - Life time: %5.1f s",
nb, accTime / 1000.0));
}
} |
Discussion: We use a status bar to display game information. The main() method creates an alien every half second up to a maximum of 40 aliens and adds it a random location with a random direction to the game window. Then main() manages the game over situation.
Each alien is an instance of the Alien class and moves independently. The actorTouched() callback gets important information about the event: A reference to the touched actor, a GGTouch reference to extract the location and the event type and a Point references that provides the exact pixel location of the touch with respect to the actor's sprite image.
We use GameGrid's act() method that is also called in every simulation cycle to display the game information in the status bar.
3 Multi-Touch Events
Almost all smartphones support multi-touch events, at least two-finger touches, because two finger gestures are becoming a standard to zoom the screen. The Android API also supports multiple finger gestures and JDroidLib provides a simple event driven multi-touch interface that follows closely the single-touch model.
package ch.aplu.tut;
import ch.aplu.android.*;
import java.util.*;
import android.graphics.*;
public class Ex12 extends GameGrid implements GGMultiTouchListener
{
private GGBackground bg;
private HashMap<Integer, Point> circles =
new HashMap<Integer, Point>();
public Ex12()
{
super(true, null);
}
public void main()
{
bg = getBg();
bg.drawFrame(WHITE);
bg.setPaintColor(GREEN);
addMultiTouchListener(this,
GGMultiTouch.press
| GGMultiTouch.pointerPress
| GGMultiTouch.release
| GGMultiTouch.pointerRelease
| GGMultiTouch.drag);
refresh();
}
public boolean multiTouchEvent(GGMultiTouch multiTouch)
{
int x = multiTouch.getX();
int y = multiTouch.getY();
int pointerId = multiTouch.getPointerId();
switch (multiTouch.getEvent())
{
case GGMultiTouch.press:
case GGMultiTouch.pointerPress:
circles.put(pointerId, new Point(x, y));
for (Point p : circles.values())
bg.fillCircle(p, 50);
break;
case GGMultiTouch.release:
bg.clear();
circles.clear();
break;
case GGMultiTouch.pointerRelease:
bg.clear();
circles.remove(pointerId);
for (Point p : circles.values())
bg.fillCircle(p, 50);
break;
case GGMultiTouch.drag:
bg.clear();
circles.remove(pointerId);
circles.put(pointerId, new Point(x, y));
for (Point p : circles.values())
bg.fillCircle(p, 50);
break;
}
bg.drawFrame(WHITE);
refresh();
return true;
}
}
|
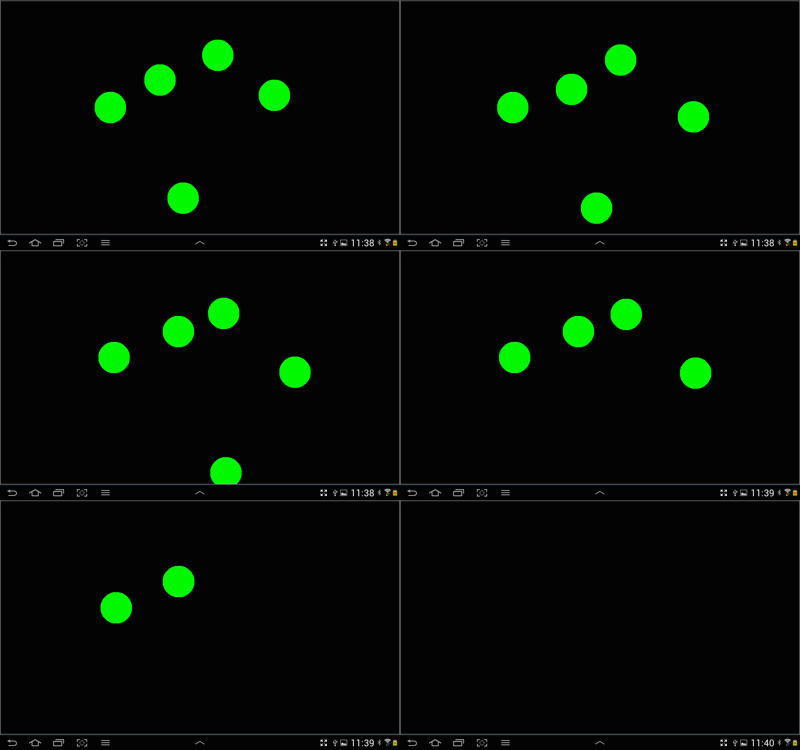
Discussion: Handling multi-touch events is not much more complicated than single touches, because the implementation is very similar. Here the callback multiTouchEvent() is used that reports the event types press, pointerPress, release, pointerRelease and drag. In addition to the single events, an integer number pointerId is used that indentifies the finger (called "pointer"). The first touch has always pointerId = 0 and triggers a press event, following touches trigger pointerPress with a unique pointerId. Following drag, pointerRelease and release events are related to the finger by the unique pointerId. pointerRelease is triggered when the second, third, ... finger lifts off, release is triggerd when the last finger lifts off.
A typical use of multi-touch is the simulation of a piano keyboard (clavier). The following code shows the application class of a fully functional clavier simulation.
package ch.aplu.clavier;
import android.graphics.Point;
import ch.aplu.android.*;
public class Clavier extends GameGrid implements GGMultiTouchListener
{
private final int nbKeys = 15;
private WhiteKey[] whiteKeys = new WhiteKey[nbKeys];
private BlackKey[] blackKeys = new BlackKey[nbKeys];
private int w;
private int h;
private int x0;
private int x1;
private int dx;
private int y0;
private int y1;
public Clavier()
{
super(true, windowZoom(600));
setScreenOrientation(LANDSCAPE);
}
public void main()
{
makeKeys();
addMultiTouchListener(this,
GGMultiTouch.press | GGMultiTouch.pointerPress);
}
private void makeKeys()
{
w = getNbHorzCells();
h = getNbVertCells();
x0 = w / 16;
x1 = w / 11;
dx = w / 16;
y0 = h / 2;
y1 = 205 * h / 500;
addActorNoRefresh(new Actor("steinway_logo"),
new Location(w / 2, h / 10));
for (int i = 0; i < nbKeys; i++)
{
whiteKeys[i] = new WhiteKey(i);
addActorNoRefresh(whiteKeys[i], new Location(x0 + i * dx, y0));
blackKeys[i] = new BlackKey(i);
addActorNoRefresh(blackKeys[i], new Location(x1 + i * dx, y1));
}
refresh();
}
public boolean multiTouchEvent(GGMultiTouch multiTouch)
{
int x = multiTouch.getX();
int y = multiTouch.getY();
int whiteIndex = (x - x0 / 2) / dx;
int blackIndex = (x - x1 / 2) / dx;
if (x < x0 / 2 || x > x0 / 2 + nbKeys * dx)
return true;
if (y < h / 4 || y > 3 * h / 4)
return true;
if (y < 11 * h / 20 && blackKeys[blackIndex].exists())
blackKeys[blackIndex].play();
else
whiteKeys[whiteIndex].play();
return true;
}
} |
Discussion: We use the coordinates of the touch to determined which key is played. We have 7 white keys per octave. To simplify the code we also define 7 black keys per octave where two of them are transparent and do not play notes. This gives us 14 white and black keys for two octaves plus an additional c-note for the next octave.
Because we set windowZoom(600), all images are dynamically transformed using the current screen size and resolution. The current screen width w and height h are read. Keep in mind that for coordinates proportions (and never absolute values or offsets) must be used everywhere in order that the graphics is properly scaled to any particular device.
The classes WhiteKey and BlackKey are derived from Actor. We only show the code for WhiteKey because BlackKey is almost identical.
package ch.aplu.clavier;
import ch.aplu.android.*;
public class WhiteKey extends Actor
{
// octave number, note name
private final static String[] whiteNotes =
{
"2c", "2d", "2e", "2f", "2g", "2a", "2h",
"3c", "3d", "3e", "3f", "3g", "3a", "3h",
"4c"
};
private final static String sound = "p"; // Piano
private int index;
public WhiteKey(int index)
{
super("white_key");
this.index = index;
}
public void play()
{
gameGrid.playSound(sound + whiteNotes[index], false);
}
} |
Discussion: The names of the sound files are coded with a prefix that determines the instrument type (p for piano), a number that identifies the octave and a number the identifies the note within the octave. The sound files (wav type) reside in the raw subdirectory of the application jar and are played by calling the non-blocking version of playSound() (with isBlocking = false).
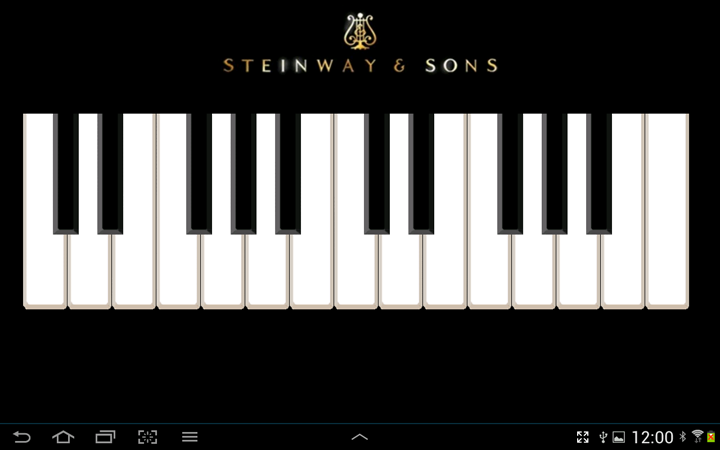
Happy music playing!
| |
 LinkUp
 TCPCom


 Simulations
